Tag: teleport
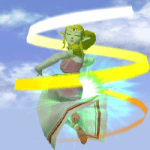
“Teleport” in context of this page refers to the action/movement after executing Zelda’s Up-B special move, Farore’s Wind. This move makes the character vanish and move to a point the analog stick is aiming at.
-
Farore’s Wind – Up-B Turn around
Another bad situation inexperienced Zelda’s can find themselves in is facing away from ledge directly below ledge. A straight up Farore’s is death due to facing the wrong way, and any other direction buries you in the stage or the abyss. However, it is possible to B turnaround Farore’s during the aiming window with extremely light control stick movement towards stage; between 5-15% of a full input towards stage. The amount required is what would put the stick out of dead zone, but not quite into tilt territory If you teleport into stage and die, you tilted too far. I’ve… continue
-
Farore’s Wind – Edge Cancels
Edge cancelling Farore’s makes the move into an extremely fast and powerful gap closing and chase tool, however the tolerance to land edge cancels is extremely small due to Zelda’s higher traction. Despite the high precision required, the payoff is immense as landing it can lead to more followups, safer recoveries, and better positioning. Horizontal teleport cancelling is by far the easiest, as it’s possible on platform to another platform and you only need concern yourself with your X position on the platform. You can get a feel for this distance by standing directly between the red arrows in the… continue
-
Farore’s Wind – Interactions and Bending The Rules
Farore’s Wind has a couple of interaction rules that are important to know and important to know how to bend. First, an aerial teleport passing downwards towards a platform will always ground Zelda on that platform, and interrupt the teleport. However, aerial teleports can be manipulated to traverse through a platform, grounding Zelda below. To do so, Zelda must land on a platform during Farore’s Wind startup animation. You can also ground a teleport by drifting Farore’s upward through a platform. This can be useful to drift yourself into a cancel spot, and give your opponent less time to read your… continue
-
Farore’s Wind – Stalling and Other Movement
Farore’s stalling is something beyond useful that begins the march towards Zelda’s insanely sticky ledge presence. If done perfectly you can be completely intangible on ledge for an indefinite period while throwing out hitboxes. Maintaining a state of invulnerability is fully dependent on the speed of releasing ledge on the first possible frame, and not fast-falling more than a couple of frames. Releasing ledge too late will leave your character vulnerable, and can lead to a quick death. Ledge stall timing is difficult to master. Experiment with different inputs and see what works for you. I strongly recommend using the… continue
-
Farore’s Wind – Sweet spotting
Furthering the knowledge from the interactions section, sweet spotting the ledge with Farore’s requires the stick to be in a neutral position when passing the ledge; similar to Sheik. Directional inputs are read as soon as you become invisible on frame 33 (lockout). It is key to use this visual cue when learning to “aim and release” Farore’s Wind. Practice execution until you can perfect the aim and return-to-neutral timing. However; staring at Zelda mid game will hinder your play; focus on reading your opponents actions before you teleport – then dictate the direction you travel. With that in mind, you can… continue